When it comes to taking advantage of your larger displays, having a tool that helps you split and arrange windows quickly goes a long way. In this guide, I take this concept further by helping you create a workflow where every corner of your screen has a purpose, and apps can be launched and rearranged quickly with keystrokes. All with a dose of beautiful a e s t h e t i c s.
Choosing the right tool
If you don’t have a window management app yet, that’s a good place to start. I will be focusing the guide on Moom but the specific tool doesn’t really matter as long as it supports these killer features:
Grids
Your chosen app should allow you define areas on your screen based on a grid that you can customize to your liking. In my case, I divide my screen in an 8x8 grid for fine-control.
Keyboard shortcuts
Many solutions out there have menus that you can click in order to rearrange windows. This can be convenient at times, but if you’re dealing with large displays, using your mouse for this is going to be time consuming.
Gaps between windows
When running commands to divide or rearrange your windows, you’ll want your window management app to leave some space or gap between them. While it make seem like a subjective aesthetic choice, it will give you some breathing room and better sense of space. Plus it looks good.
Creating a default layout
A default layout is how your windows will be arranged most of the time. You may move them around for certain tasks, but having a layout to default to will keep your workflow consistent. Before we jump to specifics, let’s first answer this question:
What apps do you use the most and what are they used for?
Make sure you group them by category. Order doesn’t matter. This is my answer:
- Internet browsing: Google Chrome
- Main work tool: kitty, a Terminal.app alternative
- Communications: Slack, WhatsApp, Messages
- File management: Finder.app
Designing the layout
This will depend entirely on your personal preference and hardware situation, but what you generally want to do is grab the apps from above and arrange them in such a way that it matches the time you spend on them and the space they actually need.
Another advice is to keep apps in the same category (such as Slack, Messages and WhatsApp) stacked since you can switch between them easily.
Here’s my layout:
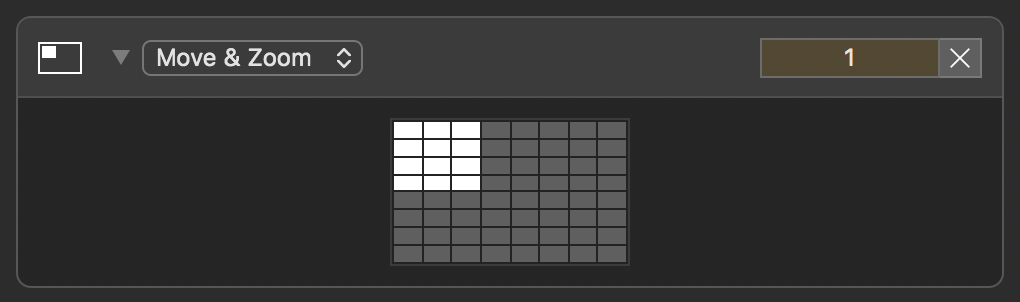
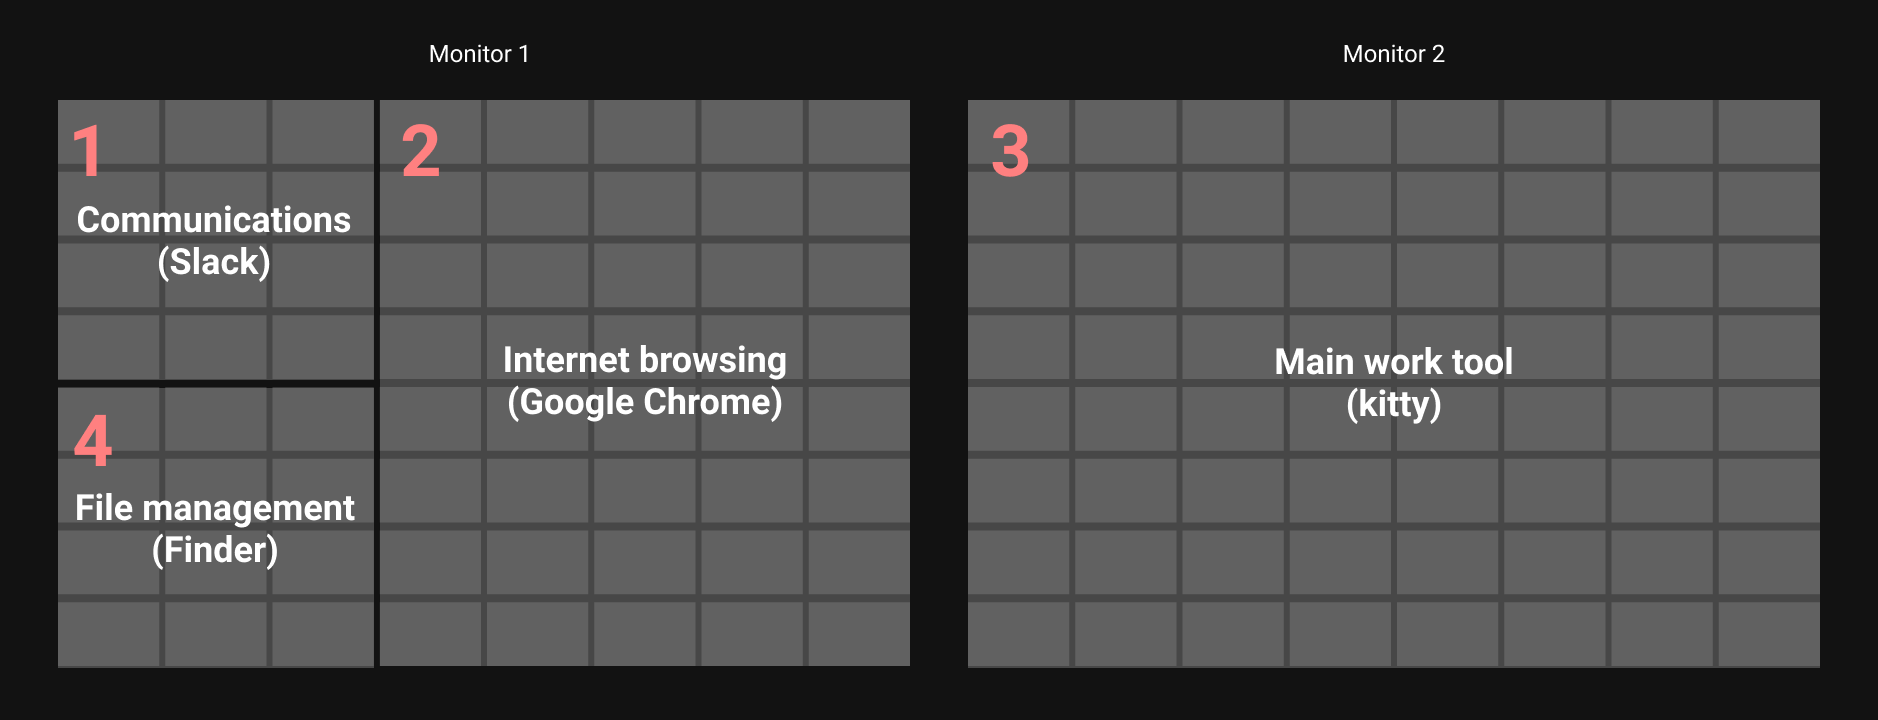 I used a 8x8 grid to help create the right proportion. E.g. I needed my browser to be a bit wider than half the screen.
I have two monitors that are the exact same size. I find that my eyes default more to the right monitor so having my work tool (3) occupy the entire screen there is more ergonomic to me. I need my browser (2) conveniently close for reference or previewing changes, but also general browsing so occupying the majority of the left screen feels right also.
Communications apps (1) are stacked up on the same quadrant on the top left of my setup and I switch to them based on need. That leaves a convenient location for file management (4) on the bottom left.
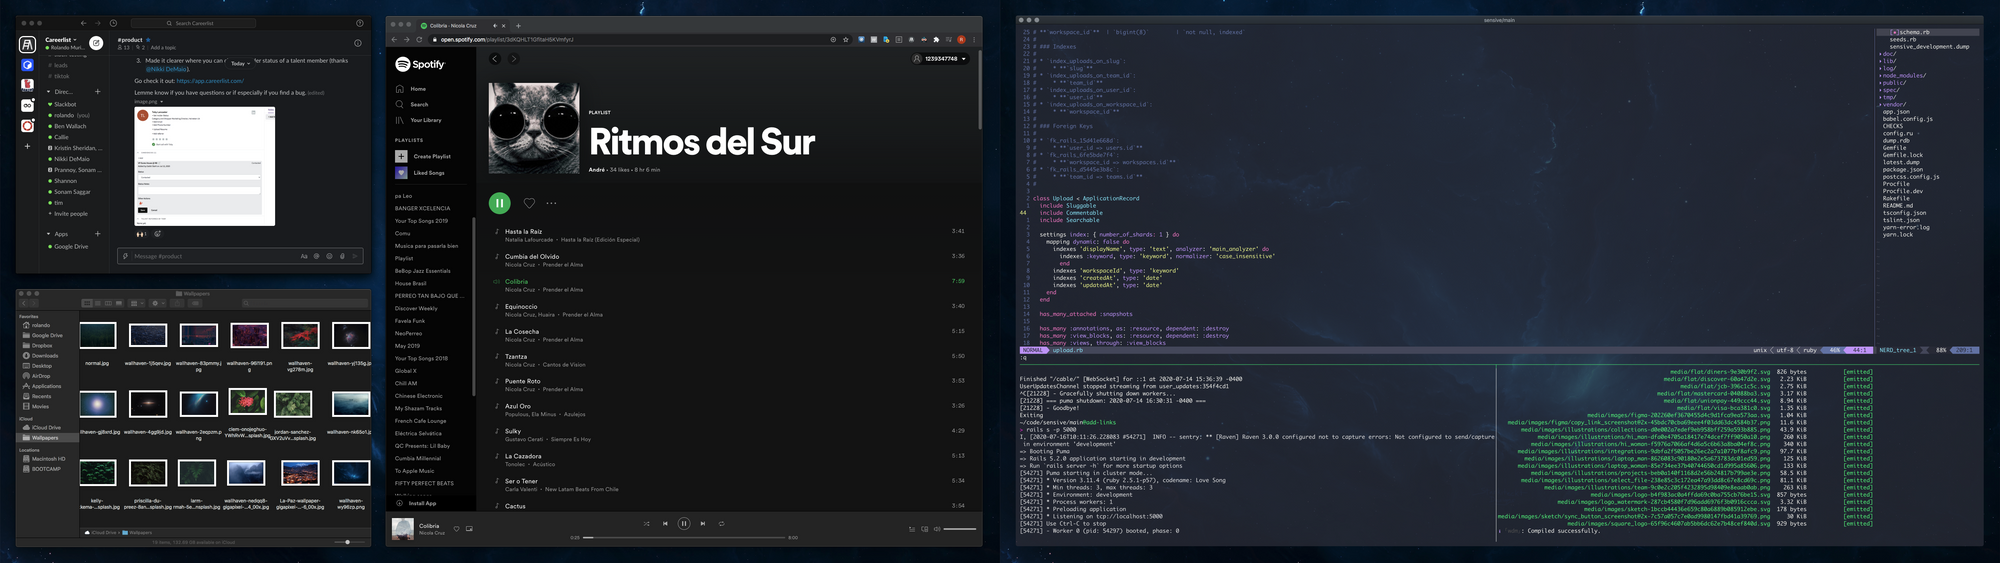
This is a screenshot of how it actually looks:
Click to zoom.
Supercharge with hotkeys
Once you’re satisfied with the layout, it’s time to make it easy to re-create with your window management tool. Moom will let you select a part of your screen and set a keyboard shortcut:
On the top right out of each of these custom settings, I can set a key to use in combination with Moom’s hotkey, which is Control + ↑ in my case. I chose 1 because its the first area from left to right. So, if I want to move Slack or any other communication tool like (Messages) to area 1, I press Control + ↑ + 1.
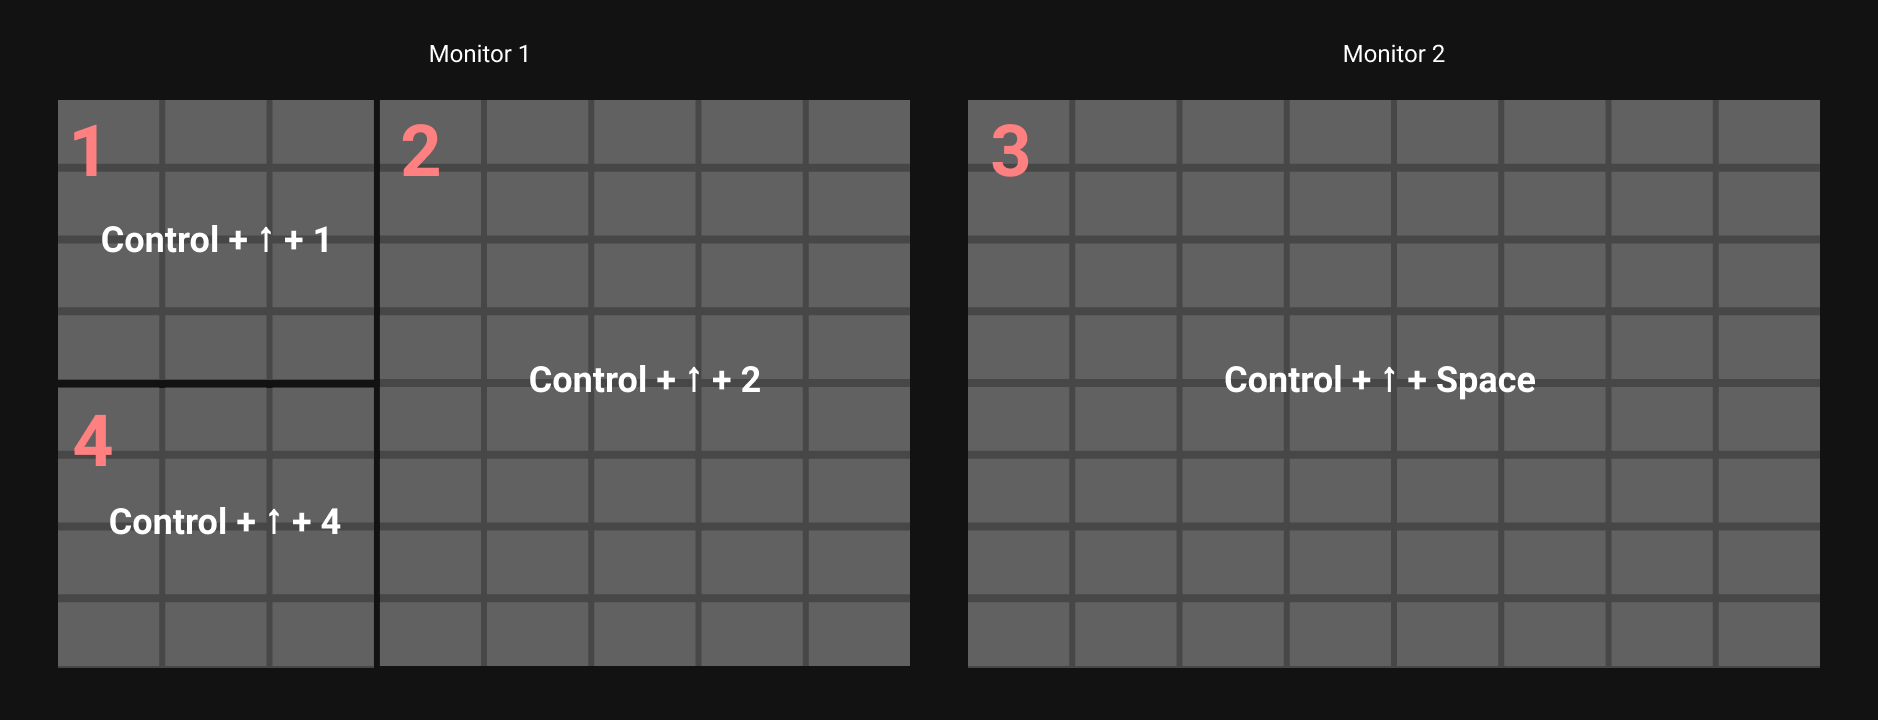 For area 3, I use Control + ↑ + Space. This is a default hotkey from Moom to occupy the entire screen.
Moom also has a custom setting that saves your window/app arrangement and lets you set up a key for it using the Arrange Windows custom setting:
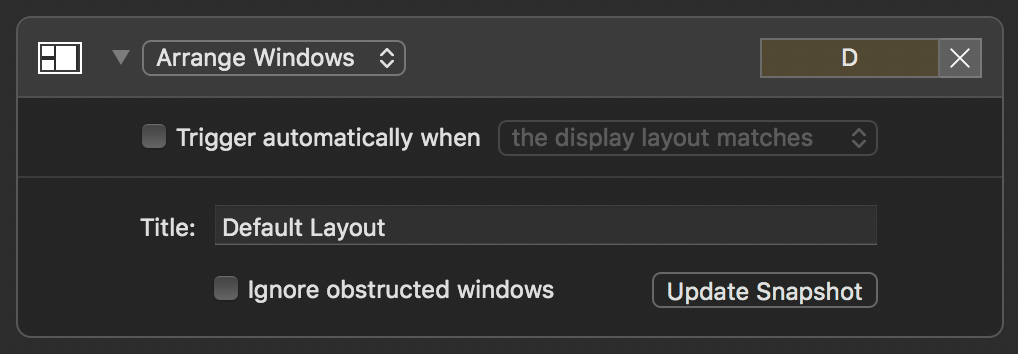 “Ignore obstructed windows” is checked by default, but I kept it on because I want other communication tools to be moved as well (even if they’re not visible)
In this case, if I want to quickly re-create my entire default layout, all I have to do is press Control + ↑ + D. If something looks off, you can move your windows again (or close apps you don’t want to be affected by this layout) and then click on Update Snapshot to save your changes.
Everyday layouts
Depending on your workflow, you may need to move windows quickly in addition to your default layout.
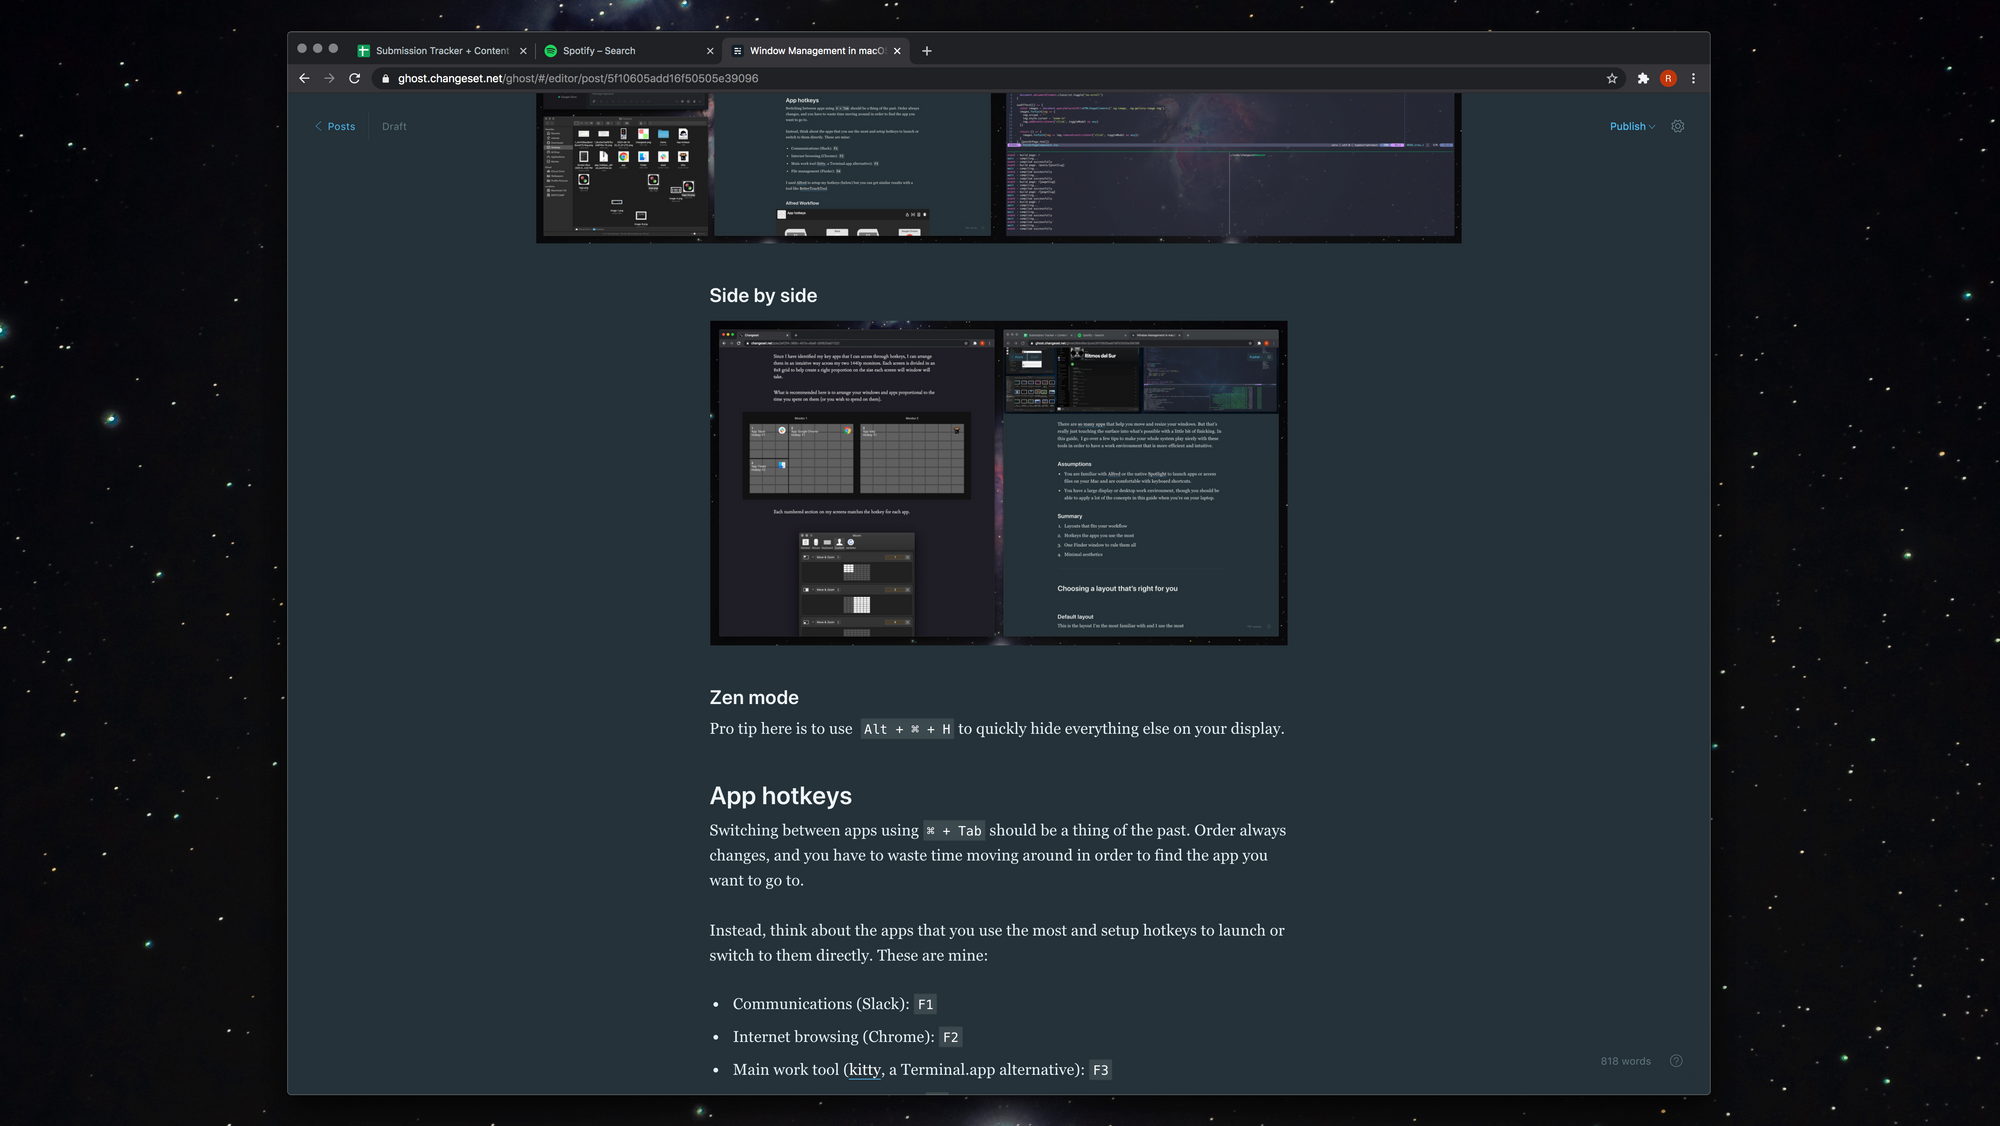
Side by side layout
Useful when you want to cross reference information or previewing. You probably already use it to some capacity, but here are some hotkeys I use that make that process easier:
- Move a window to the left half of the screen: Control + ↑ + ←
- Move a window to the right half of the screen: Control + ↑ + →
A setting like Moom’s Arrange Windows also comes handy for this, all you have to do is put the two type of windows you want side by side and set it up:
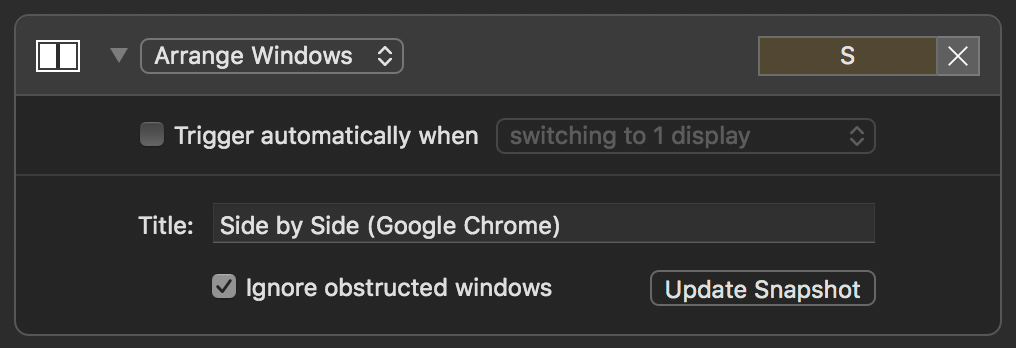 In this case, I do want to Ignore obstructed windows because I only care about the windows visible.
So the keyboard shortcut for this ends up being Control + ↑ + S. If you use a setting like this, you may need to do it per app/window combination.
Zen layout
Even with so much productivity and multi-tasking gains from your default layout, sometimes you just want to focus on one thing at a time. Now, you could take an app fullscreen, but dealing with a big display the contents of that window can look weird or unappealing.
What I call a zen layout is really just a combination of two things:
- A hotkey to center a window and give it just the right width so the content inside of it doesn’t look weird.
- Hide everything else with the Mac’s standard shortcut Option + ⌘ + H
In Moom, a setting for my zen layout looks like this:
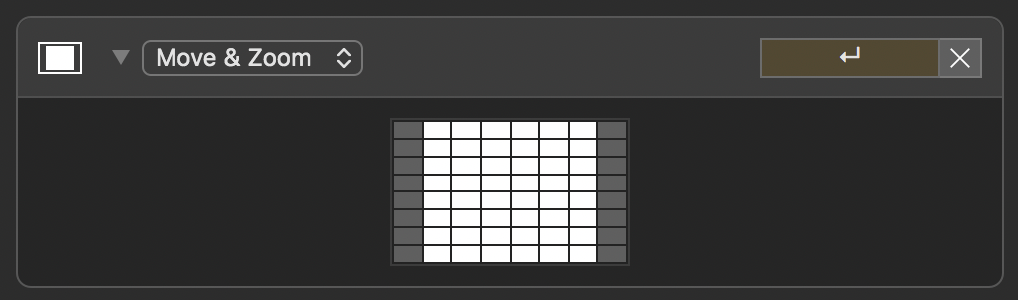
So now I can trigger this configuration with Control + ↑ + ↵ Enter.
Launch or switching apps with hotkeys
Using ⌘ + Tab should not be your main way to move between apps. The order of the list changes constantly, and you waste time moving around in order to find the app you want.
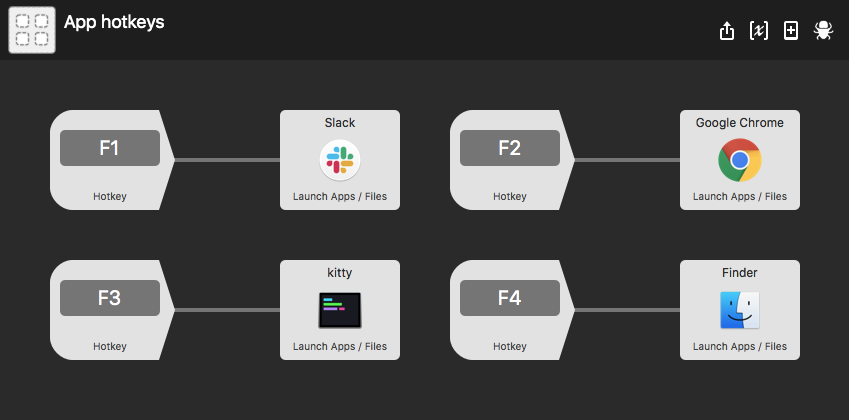
Instead, give your most accessed apps a hotkey. This way, you’ll know exactly what app is opening and it will become second nature. These are my hotkeys:
- Communications (Slack): F1
- Internet browsing (Chrome): F2
- Main work tool (kitty): F3
- File management (Finder): F4
- Communications (Messages): F5
- Communications (WhatsApp): F6
I use function keys because they’re close to me on the keyboard and the number roughly matches their location on screen, but please choose something that is comfortable and convenient to you, otherwise you won’t stick to it.
To setup these hotkeys, I made an Alfred workflow (below) but you can get similar results with a tool like BetterTouchTool.
Alfred Workflow
A very important point here is to make sure triggers are executed instantly:
 If you don’t do this, you will be waiting about a second to access each app.
Download .alfredworkflow
Launch or switching to other apps
Use ⌘ + Space and type the first three or four letters of less common apps instead of using ⌘ + Tab. Trust me, it’s faster. Not to mention it’s the same command you can use to open for files or folders; or to perform other quick actions.
Centralizing the Finder window
If you’re like me and have a hotkey to focus on the Finder window and also allocated a dedicated space for it in your default layout, I strongly suggest you make tabs the default behavior for it.
What this means is that whenever you reveal a file or folder on Finder (via Alfred, Spotlight, etc.) they will now open on a new tab on the same window you already have open. You’ll never have to go dig for multiple Finder windows again.
All you have to do is open your Dock settings on System Preferences:
 This setting will ensure that whenever you open folders using Alfred, your terminal or code editor it is done in a predictable location
Minimal aesthetics
Make room for beautiful wallpapers by getting rid of noise on your screen.
No desktop icons
Every time you need to grab something from your desktop, it means you have to move windows to the side and waste time looking for where things are. A computer is supposed to help us find things easily. Access your Desktop through your central Finder window instead.
Unfortunately, there isn’t a way to hide your Desktop icons through any settings. So you’ll have to run some commands on your terminal:
defaults write com.apple.finder CreateDesktop -bool false && killall Finder
One-liner to hide icons
defaults write com.apple.finder CreateDesktop -bool true && killall Finder
One-liner to undo this.
No dock
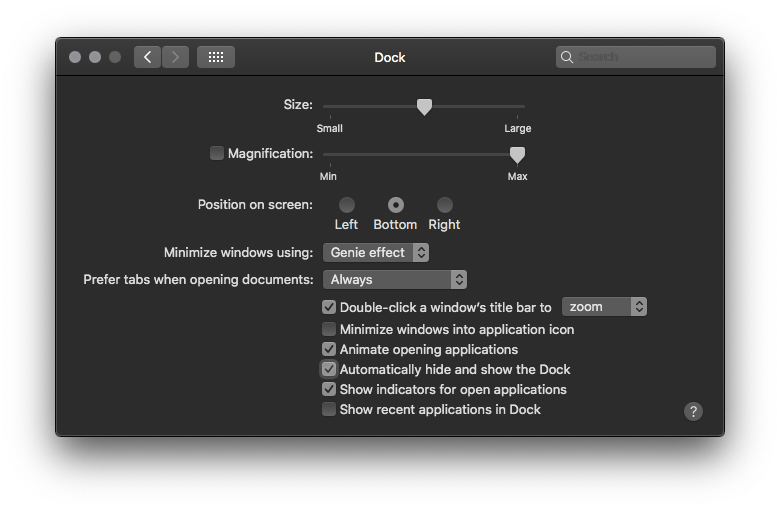 My Dock preferences pane. Notice “Automatically hide and show the Dock”.
Some people like to have the dock to the side (a la Ubuntu). I prefer to not see it. I don’t really need to see what apps are open, I already know.
No menu bar
My General preferences pane. Notice “Automatically hide and show the menu bar”. Similarly, I always know which app I’m on, and I’m aware of most of the keyboard shortcuts I need the majority of the time, so no need to see this information either. The menu bar is always there if I need it by using option+cmd+d or hovering to the top of the desktop.
Wrapping things up
Hopefully these tips make your life a bit easier. A partying piece of advice is to always experiment with new layouts and configurations until you find one that works for you. I used to prefer working on my smaller laptop screen until I took the time to explore my options with larger displays and multiple monitors. Only then did I realize how much more productive I could be.